
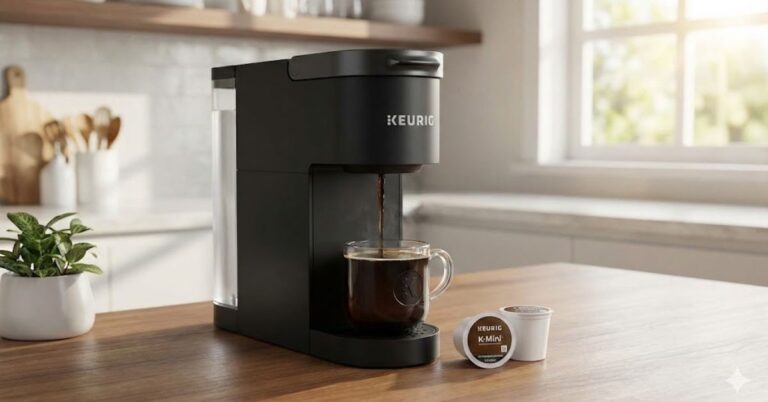
For many of us, the morning doesn’t truly begin until that first cup of coffee hits the desk. But if you live in a studio apartment, a college dorm, or simply battle with a cluttered kitchen counter, fitting a massive brewing machine into your life is a logistical nightmare. Enter the Keurig K-Mini Coffee Maker.
Marketed as the ultimate solution for small spaces, this brewer claims to deliver the signature Keurig convenience in a package that is less than five inches wide. But does shrinking the machine mean compromising on the quality of your brew?
In this in-depth review, we are going to tear down the specs, test the performance, and help you decide if the Keurig K-Mini Coffee Maker is the right investment for your caffeine routine. We will cover everything from brew temperature to maintenance, ensuring you have all the data needed to make a smart purchase.
Table of Contents
What is the Keurig K-Mini Coffee Maker?
The Keurig K-Mini Coffee Maker is a single-serve brewer designed explicitly for space efficiency. Unlike the larger Keurig K-Elite or K-Classic models, which feature bulky side water reservoirs and complex digital screens, the K-Mini strips the brewing process down to its essentials.
It is a “pour-over” style mechanical brewer. This doesn’t mean it makes pour-over coffee in the traditional barista sense, but rather that you must pour fresh water into it for every single cup you brew. There is no standing water tank. This design choice is exactly what allows it to maintain such an incredibly slim profile.
Quick Specs & Data
- Dimensions: 12.1” High x 4.5” Wide x 11.3” Deep
- Weight: Approximately 4.6 lbs (lightweight and portable)
- Brew Sizes: 6 oz to 12 oz (determined by water added)
- Cord Length: 26 inches
- Power: 120V / 60Hz
- Colors: Available in matte finishes like Studio Gray, Black, Oasis, and Dusty Rose.
Performance: How Does It Brew?
We tested the Keurig K-Mini Coffee Maker to see how it performs in real-world scenarios. Here is the breakdown of the brewing experience.
Brewing Speed
If you are used to the instant brewing of the larger Keurig models (which keep a tank of water hot internally), the K-Mini will feel slightly slower.
- The Process: Because it heats fresh water from room temperature for every cup, the cycle takes about 2 minutes.
- The Noise: It is relatively quiet. You will hear a low hum as the water pumps in, followed by silence as it heats, and then a final “whoosh” as the coffee extracts.
Temperature and Extraction
The water temperature typically hits the sweet spot of 190°F to 195°F, which is standard for pod brewers. However, because the water passes through the grounds relatively quickly, the extraction can sometimes be on the lighter side.
Pro Tip: To get the best flavor out of your Keurig K-Mini Coffee Maker, we recommend using the 6 oz or 8 oz water amount. Using the full 12 oz can sometimes result in a watery cup, as the K-Cup pod only holds a fixed amount of coffee grounds.
Keurig K-Mini vs Keurig K-Mini Plus:
This is the most common point of confusion for buyers. There are two “Mini” models, and while they look nearly identical, the differences impact usability significantly.
| Feature | Keurig K-Mini (Standard) | Keurig K-Mini Plus |
| Water Reservoir | Fixed (Pour into machine) | Removable (Fill at sink) |
| Strong Brew Button | No | Yes |
| Pod Storage | No | Yes (Holds 9 pods) |
| Finish | Matte Plastic | Matte with Chrome Accents |
| Price | Affordable Entry-Level | Slightly Higher Premium |
Which one should you choose? If you enjoy a bold cup of coffee, the Strong Brew button on the Plus model is worth the extra cost. It slows down the water flow to extract more flavor from the pod. However, if you just want a quick, standard cup of coffee and want to save $20-$30, the standard K-Mini is perfectly capable.
Step-by-Step: How to Use the Keurig K-Mini:
Using the machine is intuitive, but there is a specific order of operations to follow to ensure it works correctly.
- Plug in and Power On: Press the power button on the top right.
- Fill the Reservoir: Pour fresh water into the reservoir. Use your mug to measure the amount (between 6 oz and 12 oz).
- Note: The machine will brew all the water you pour in. Do not overfill past 12 oz.
- Insert the Pod: Lift the handle, place your K-Cup pod in the holder, and lower the handle firmly to puncture the lid.
- Brew: The brew indicator light will pulse. Press the shiny “K” button in the center.
- Wait: The machine will heat the water (about 60-90 seconds) and then dispense your coffee.
Cleaning and Maintenance:
To extend the lifespan of your Keurig K-Mini Coffee Maker, regular maintenance is non-negotiable. Since there is no removable tank, keeping the internal components clean is vital.
Daily Maintenance
- Eject the Pod: Never leave a used pod in the machine overnight. The damp grounds can encourage bacterial growth or clog the needles.
- Rinse the Drip Tray: Coffee spills can get sticky and attract pests. Wash the removable tray with warm soapy water.
Descaling the K-Mini
Scale is the buildup of mineral deposits (calcium and lime) from your water. If your “Descale” light turns on, or if your coffee starts pouring slowly, it is time to clean.
- Solution: Mix Keurig Descaling Solution or white vinegar with water (1:1 ratio).
- Pour: Add the solution to the water reservoir.
- Run Cycle: Lift and lower the handle (without a pod) and press the brew button. Let the hot solution run into a ceramic mug.
- Rinse: Repeat the process with fresh water only at least 2 or 3 times to flush out any vinegar taste.
Target Audience: Who is This Machine For?
After testing and researching consumer feedback, we’ve identified exactly who benefits most from this compact brewer.
1. The College Student
Dorm rooms are notoriously cramped. The K-Mini fits on a small desk or bookshelf, and the auto-off feature complies with most university fire safety regulations.
2. The Remote Worker
If you work from home, having a Keurig K-Mini Coffee Maker in your office prevents you from constantly running to the kitchen (and getting distracted by chores). It is the perfect “personal” coffee station.
3. The Occasional Coffee Drinker
If you only drink coffee on weekends or when guests come over, a large machine with a water tank will result in stagnant, stale water. The K-Mini ensures you use fresh water every single time.
Pros and Cons Summary:
Pros:
- Space Saving: Unbeatable footprint for small counters.
- Fresh Water: “One cup” reservoir ensures fresh water for every brew.
- Cord Storage: Keeps countertops looking tidy.
- Sustainable: Compatible with the My K-Cup Universal Reusable Filter (sold separately) to reduce plastic waste.
Cons:
- Slower Brewing: Takes longer than tanked models due to on-demand heating.
- Refill Fatigue: You must pour water for every single cup, which can be annoying if brewing for multiple people.
- Splatter: Without the drip tray, shorter mugs sit low, causing coffee to splash occasionally.
Conclusion:
The Keurig K-Mini Coffee Maker is a masterclass in compromise. It trades the speed and capacity of larger machines for a sleek, space-saving design that fits anywhere. While it may lack advanced features like temperature control or a strength setting (found in the Plus model), it succeeds at its primary goal: delivering a hot, convenient cup of coffee in the smallest footprint possible.
For students, singles, and small-space dwellers, it is arguably the best budget-friendly brewer on the market. It is reliable, stylish, and gets the job done without taking over your kitchen.
Frequently Asked Questions:
How do I reset my Keurig K-Mini?
If your machine is acting up, you can perform a simple reset. Unplug the machine and leave it unplugged for at least 5 minutes. While it is off, remove the pod holder and clean the exit needles with a paper clip to ensure no grounds are clogging the system. Plug it back in and try a water-only brew.
Can I use the Keurig K-Mini for tea or hot cocoa?
Yes, the Keurig K-Mini Coffee Maker works with any standard K-Cup pod, including tea, hot cocoa, and cider. We recommend running a “cleansing brew” (hot water with no pod) after brewing sugary drinks like hot cocoa to prevent the needles from getting sticky.
Why is my Keurig K-Mini leaking?
Leaks usually occur if you overfill the water reservoir. The max fill line is 12 oz. If you pour in more, the water flows into the overflow channel and out the back or bottom. Ensure you measure exactly what you need before pouring.
Does the Keurig K-Mini use a lot of electricity?
No, it is quite energy efficient. It only draws significant power while heating the water (about 2 minutes per cup) and automatically shuts off 90 seconds after brewing, meaning it won’t drain electricity all day like older coffee pots.
How much water do I put in the Keurig K-Mini?
You should pour in exactly the amount of coffee you want to drink. The minimum is 6 oz and the maximum is 12 oz. The machine does not save water; if you pour in 10 oz, it will brew a 10 oz cup.